The Easiest Way to Connect Your Obsidian Vault with GitHub (Updated)
Step-by-step guide to connect your Obsidian vault with GitHub for easy blog publishing and note synchronization.
The Easiest Way to Connect Your Obsidian Vault with GitHub (Updated)
I use the Chirpy theme with GitHub Pages to publish my blogs, and I wanted a way to publish my blogs easily without leaving Obsidian and opening the command line or Git to type commands.
By the end of this tutorial, you will be able to sync your notes or publish your blogs from Obsidian to GitHub for free!
Prerequisites
- Create a repository or use any existing repository on GitHub
- Download Git and install it on your system
- Create a personal access token from GitHub
- Example:
- Set scopes to “repo” and expiration to “no expiration” or anything you want
Setup Steps
- Install the Obsidian Git community plugin
- Create a folder in Obsidian to store the repository
- Run the command (Cmd/Ctrl + P):
Clone an existing remote repo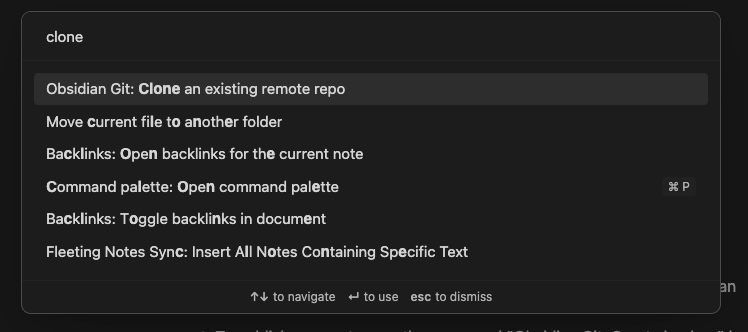
- Paste the URL of the repository in the following format:
1
https://<PERSONAL_ACCESS_TOKEN>@github.com/<USERNAME>/<REPO>.git
For example, it might look like this:
1
https://ghp_XXXXXXXXXXXXXXXXXXXXXXXXXXXXXXXXXXXX@github.com/USERNAME/REPO-NAME.git
- Enter the folder name you created in step 5 (e.g.,
remote-blog/)- Leave blank and click enter if it asks for any more options
- Restart Obsidian
- Make edits to your notes
- Publish your notes by running the commands:
- “Git: commit”
- “Git: push”
- Open the command palette (Cmd/Ctrl + P) to run these commands
References
This post is licensed under CC BY 4.0 by the author.